Drip Irrigation for Tomatoes: Setup & Watering Schedule
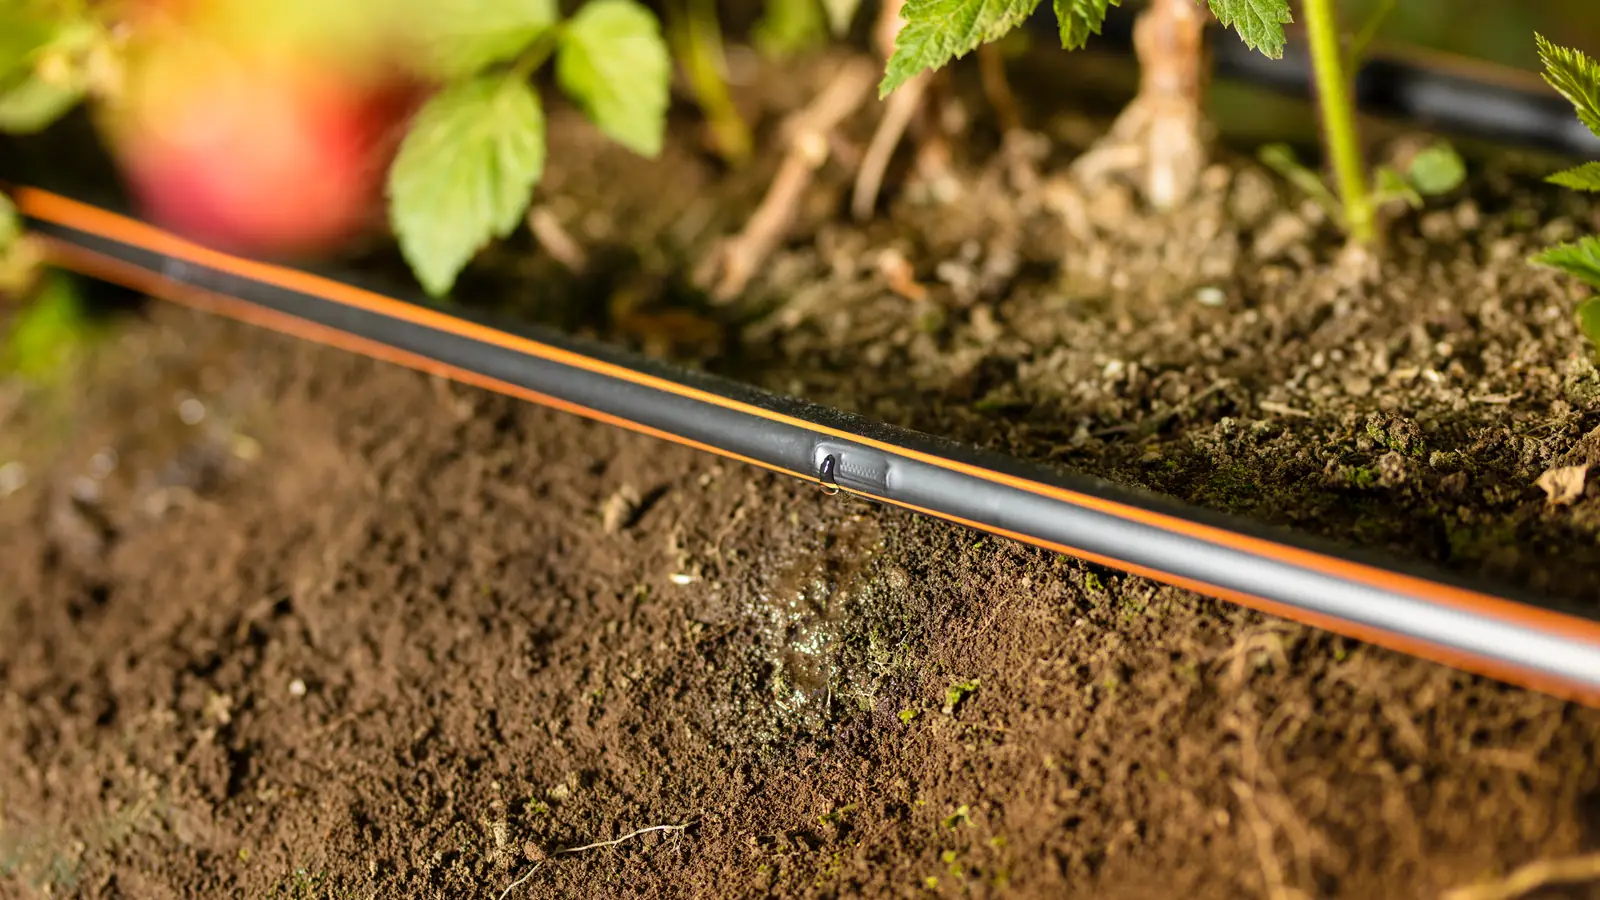
Table of Contents
Why Tomatoes Respond to Drip
Tomatoes are the crop that makes drip irrigation look like magic, and the reason is disease, not just water. Tomato foliage that stays wet overnight is a breeding ground for blight and leaf spot; drip delivers water to the soil only, keeping leaves dry. Combined with 50–70% water savings versus sprinklers, that disease suppression is why nearly every serious tomato grower — from 100-plant backyard rows to multi-hectare trellised fields — runs drip.
Tomatoes also have a precise water appetite: too little at fruit set causes blossom-end rot; too much after color break splits fruit. Drip's slow, controlled application is the only practical way to hit that narrow window crop-wide.
System Layout for Rows
The standard layout is one lateral per row, laid at transplant time before the plants close canopy:
- Header: 16 mm PE pipe along the row end, fed by a filtered, regulated zone (120-mesh filter, regulator at 1.0–1.5 bar).
- Laterals: one drip line per row, placed on the soil surface 5–10 cm from the stem line, or 10–15 cm deep for subsurface setups on permanent beds.
- Staking: anchor laterals with pins every 1–2 m so cultivation and harvest traffic doesn't drag them.
- Mulch: on plastic-mulched beds, lay the drip line under the mulch before planting. Black mulch plus drip cuts weed pressure and evaporation and warms the root zone.
For double-row beds (two plant rows on one bed), use one lateral down the bed center or two laterals 30–40 cm apart, depending on emitter spacing and bed width.
Drip Line & Emitter Choice
Tomato systems need emitters that tolerate the narrow water window and the fertigation load:
- Flow rate: 2 L/h per emitter is the sweet spot for most tomato soils; 4 L/h for sandy soil or wide spacing. Range across the catalog is 2–16 L/h, but tomato rows rarely need more than 4.
- Spacing: 20–30 cm between emitters matches typical transplant spacing of 30–45 cm; every plant gets at least one emitter.
- Pressure-compensating vs non-PC: non-PC emitters are fine on flat ground with runs under 50 m. Choose pressure-compensating for slopes, long runs, or if you plan to extend the block later.
- Material: drip line with UV-stabilized tubing and turbulent-flow emitters that self-clean on pressure cycles — essential when you fertigate, because fertilizer precipitates are the main clogging risk after sediment.
Watering Schedule by Stage
Tomato water use changes dramatically through the season. A transplant needs little and often; a heavy-fruiting plant in summer can pull 4–6 L/day. Schedule by stage, checking soil moisture weekly and adjusting:
| Stage | Water per plant per day | Frequency | Notes |
|---|---|---|---|
| Transplant to establishment | 0.2–0.5 L | Daily or twice daily | Keep the root ball moist, not soaked |
| Vegetative growth | 1–2 L | Every 1–2 days | Let the top 5 cm dry between irrigations |
| Flowering & fruit set | 2–3 L | Daily | Never let plants wilt here — blossom-end rot risk |
| Fruit fill | 3–6 L | Daily, sometimes split | Peak demand; split into two cycles on hot days |
| Color break to harvest | 2–4 L | Every 1–2 days | Cut back gradually to reduce fruit splitting |
These are starting points for a 2 L/h emitter at 30 cm spacing — measure actual emitter output on your line and adjust run times so the delivered liters match the table.
Fertigation
Drip's second superpower is feeding: soluble fertilizer injected into the irrigation water lands exactly in the root zone, in the concentrations the crop needs per stage.
- Nitrogen: push N through the vegetative and fruit-set stages; cut back during fruit fill to avoid excessive foliage.
- Calcium: calcium nitrate injections during fruit set directly reduce blossom-end rot — the classic drip-fertigated tomato advantage.
- Injection order: inject fertilizer, then run clear water for 5–10 minutes to flush the lines. Fertilizer left standing in drip line precipitates and clogs emitters.
- Backflow: always use an injector with a backflow preventer so fertilizer never siphons into the water supply.
Common Problems
- Clogged emitters from hard water or fertilizer — the fix is prevention: filter at 120 mesh, flush laterals monthly, and run the clear-water flush after every fertigation event.
- Blossom-end rot from irregular watering — drip only helps if the schedule is consistent; a wilting episode at fruit set will still cause it.
- Fruit splitting at color break — too much water late in the season; cut back as the table above shows.
- Rodents chewing lines — common on mulched beds; bury lines slightly or use thicker-wall drip line in problem areas.
- End-of-season storage — drain, flush with clean water, coil out of direct sun; UV-degraded line cracks its first season back.
Tomato drip is the highest-return irrigation investment a vegetable grower can make: the hardware is standard, the schedule is stage-based, and the payoff shows up in both water bills and marketable yield.
NEXT STEP
Ready to Upgrade Your Irrigation?
Send us your requirements — our team responds within 24 hours with pricing and lead time.
Written by
Ray ChanIrrigation Buyer's Guide Author · Drip Irrigation Specialist. Ray helps global importers and growers source reliable irrigation products.